My first exposure to branching scenarios was Connect with Haji Kamal designed by Kinection and Cathy Moore. I absolutely loved it, could see the potential in learning design, and was hooked right away. That was almost a decade ago and I’m still hooked. Branching scenarios are a great way to incorporate a safe play space for learners to make decisions, and to learn from both mistakes and good choices.
One of the keys to creating a great branching scenario is choosing the right topic. Some areas lend themselves to branching scenarios better than others. In general you need a situation that:
1. Tells a story your learners can relate to
2. Includes multiple, viable choices
3. Is not so complex that there is no way to realistically “win”. (Although there are some situations where a Kobayashi Maru will work.)
I recently developed an Employment Termination branching scenario for a client and have since edited it to make it a bit more generic.
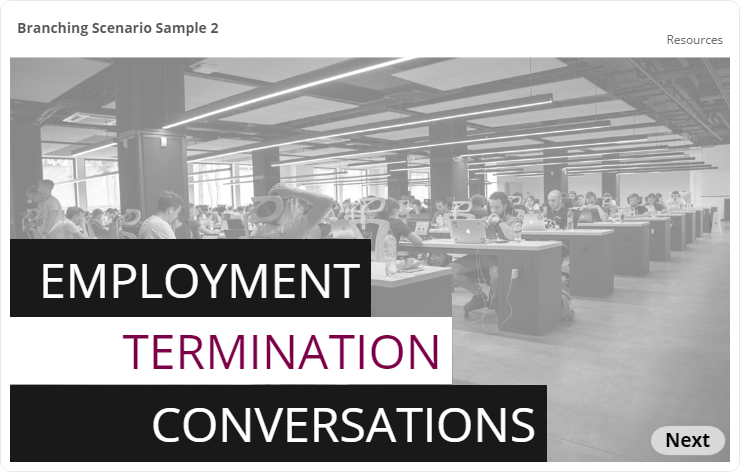
Click here to launch in a new window or tab.
The goal of this scenario is to reinforce learning that had already taken place and to prepare learners for forthcoming training that would build on what they had learned. The original scenario developed for the client was joy to work on because they had clearly outlined the best steps, OK steps, and the worst step to take when terminating an employee. All I had to do was write narratives that matched their existing content and then create the branching. Here are the steps to creating this kind of branching scenario, from beginning to end.
Step 1: Determine the goal
Step 2: Write the endings, create the character(s), and background
Step 3: Decide on layout, colours, fonts, style, and button design
Step 4: Create the main scenes
Step 5: Write the scenarios
Step 6: Build the slides and layers
Step 7: Test, test, test and launch
1: Determine the goal
This isn’t meant to be a graded activity. Rather, the goal is to reinforce learning that has already take place. The key learning to be reinforced, in the order of importance, are:
1. People can react in a variety of way to being terminated
2. For each reaction there is an optimal response
3. If a less than optimal response is chosen there is usually a way to recover
Also touched on is the need to follow policy and company practices such as only terminating employees early in the week, and after termination escorting them from the building. These are not universal but are common practices in many organizations.
2: Create endings, characters, and backgrounds
With the goals and key messaging decided on the next step is to create the endings. Always begin with the end in mind! In this scenario I decided on four possible endings. One best ending, one OK ending and two bad endings. The best ending links to a congratulation slide while the OK and the bad endings prompt the learner to try again.
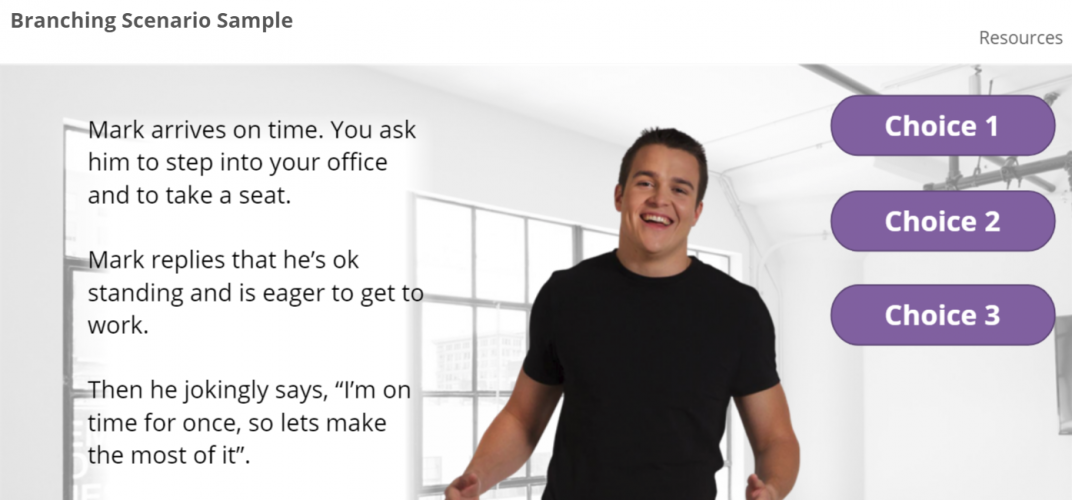
Creating the background and context is next. In order to write the background I needed to create a character to write about. This is the fun part. I decide on a twenty-something, white male and named him Mark. I know, young white males get picked on a lot but one thing you don’t want to do is appear to be biased against a group that is less than privileged. That’s just not cool!
The goal was to provide enough context to make the activity engaging while not providing so much information that the scenario couldn’t be generalized for lots of different learners. I did not provide any indicators about who the supervisor might be. In other words I made the person being terminated fairly realistic and planned on using photographic content to portray him. The person doing the terminating was only described as “a new supervisor” to make it easier for the learner to step into that role.
3: Decide n the layout and style
I like to get this done early so I don’t have to go back and re-do style elements later on. The client had branding guidelines to follow but for this example I created the style based on a fictional company and a learner group primarily made up of junior supervisors aged 25 – 35.
For this example scenario I was able to find all the graphics I needed in the built-in Articulate 360 content library, except for the clapping hands which I found on Pixabay.
4: Create the main scenes
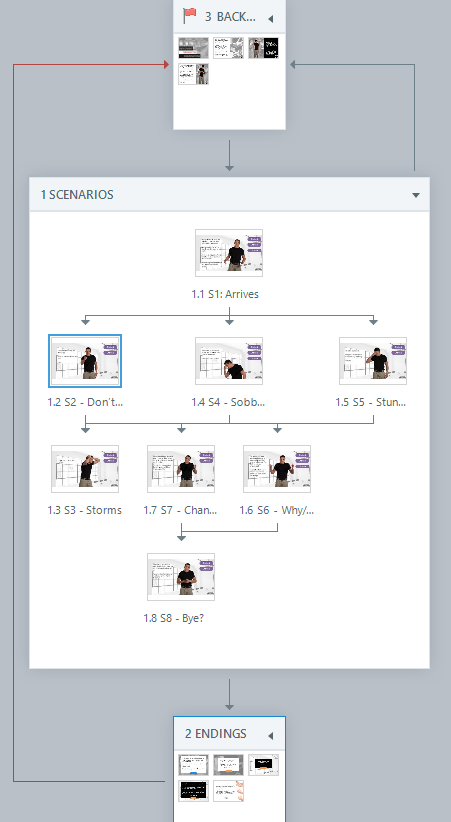
In Storyline I created a scene for the slides that would be branched plus a scene for the background information and a scene for the endings. You don’t have to do this. You can alternatively use just one scene. Or you can, if you like, have a scene for each scenario. I prefer using three scenes so I can review each scene separately. I also prefer creating the main scene first so it auto numbers 1.1, 1.2, etc. I find it less distracting to have slides that are labeled 1.1 S1 , 1.2 S2, etc., than having slides labeled something like 4.5 S1.
5: Write the scenarios
I’ve used many different processes for writing scenarios and creating the branching order. Twine is a good choice and recently I’ve begun using Plectica, a visual mind-mapping tool, and have found it to also be good choice.
The tools you use will depend on your comfort level, complexity of the scenario, and in many cases how and with who you are sharing it with.
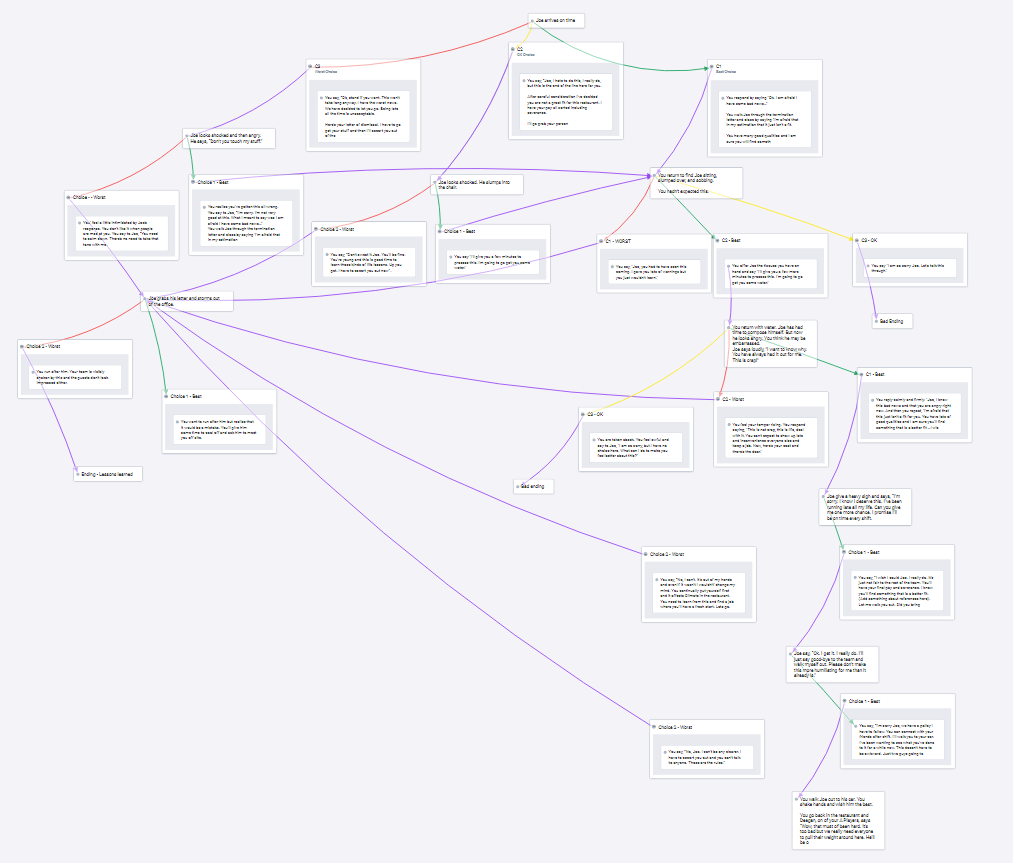
I created a mind-map for this scenario using Plectica. It was a great way to begin organizing the branching, its shareable, and you can invite folks to collaborate.
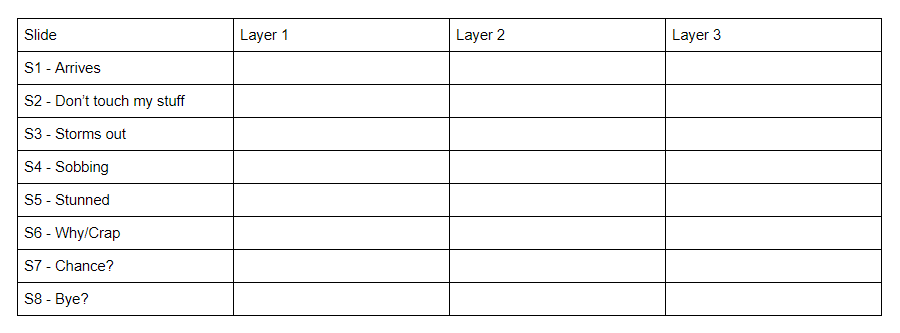
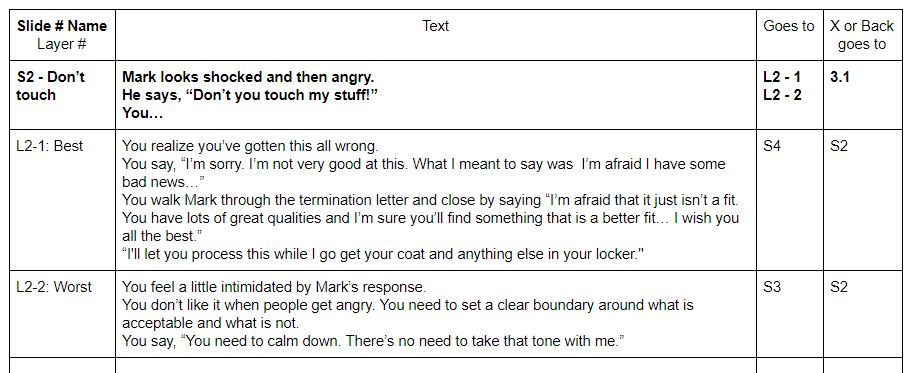
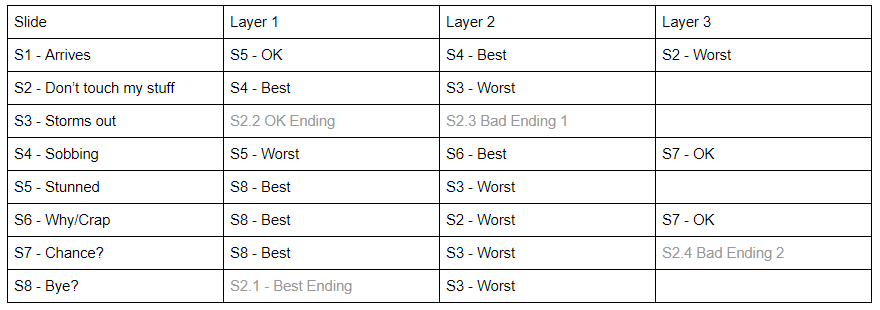
Before I get to these I usually create two charts, beginning with a chart for just the scenarios. Sometimes charts are all you need. I use Google docs most of the time but have been known to break out the post its and decorate a wall or two.
In this branching scenario I created 8 scenarios. Each scenario – a consequence that describes what is happening – would eventually have 2-3 choices displayed in layers.
This is a good time to decide on the naming conventions and numbering. I used S1 – 8 for the main slides that hold scenarios while the layers are named L (S#):#.
For example the 3rd layer in S4 would be L4:3. In simple scenarios this may not matter but once you get into more complex scenarios where more than one layer branches to the same slide… well it can get mind-bending.
Each of the 8 slides holds one scenario that describes the situation and what Mark is doing. Each layer contains a choice the learner can make based on the situation and Mark’s behaviour.
This outline chart goes with another chart that holds the text that will go on each slide and layer.
Once this part is done add the layer names to the outline chart for easy checking and referencing.
6: Build the slides and layers
Now that the text for each slide and layer has been written and the branching determined its time to build the slides. Before adding content double check that you and your client love the style, colours, buttons, and fonts. Then create master slides and a template for the background, the scenarios and the endings. Then you can just duplicate slides and not have to recreate buttons, etc.
At this point you should, if you haven’t already, make a final decision on the player settings. For example in this instance I removed the menu and the built-in Back and Next buttons opting to place those on the slides. I prefer that visually and find it gives me better control over the back and next functions. I left the Resources tab because this would be where learners would access reference documents.
Best practice in my experience is to build each slide first then add the layers and then create the triggers using the chart.
Do not forget to set each of the scenario slides to “Reset to initial state” in properties. In the layer properties leave the setting at “Automatically decide” so they don’t reset when folks close a layer. Background and ending slides, that do not have layers, can also stay at the default setting of “Automatically decide”.
7: Test and launch!
If you can, get several people to test for you.
Buy them cookies if needed. The more eyes on these the better.
And that’s it. Seven steps to branching beauty and goodness!
P.S. Here’s a flowchart for the Kobayashi Maru

